Kitchen Waste
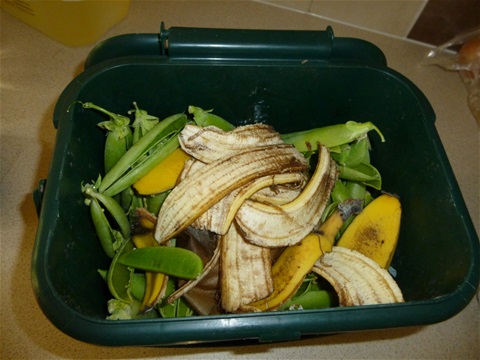
Uncooked kitchen waste
(not citrus or onion) for the wormery
About a third of household waste is likely to be kitchen generated organic matter. Recycling it at home by means of a wormery reduces the waste sent to landfill and saves on the costs of domestic waste collection, transport and disposal as well as providing wonderful free compost and liquid plant food.
A Wormery has the advantage over a normal compost bin in that it can be located in the garden or in a shed, garage or balcony and produces compost in 6-8 weeks. In the UK they are usually recommended for the composting of uncooked kitchen waste (except onion and citrus) but they can be used for small quanities of cooked food and some garden waste .
A wormery is clean, simple to use and should be odour free. In addition to rich compost the wormery will produce “Worm wee” a nutrient rich organic liquid feed suitable for both the garden and pot-plants. Worm tea plant food can also be made from the worm casts in the same way as Compost tea can be made from conventional compost.
| Feed worms Uncooked kitchen waste e.g. Fruit (not citrus or onion), e.g. Peelings, Cabbage leaves, Coffee grounds & tea bags, Cereal, Bread (only small amounts) Raw vegetables, Cooked vegetables (small quanties only to avoid flies and odours) Annual weeds, Green leaves, Cow/horse manure Shredded computer paper, newspapers, cardboard . Egg shells Plate scrapings and refrigerated food that has "gone off" | Do Not Give worms Onions, shallots, leeks, garlic* Citrus fruit* Meat & fish, Baked beans, Rice or pasta, Cooked potatoes, Cheese (see note below) Grass, Perennial weeds, Diseased plant material, Glossy paper Cat or dog faeces (except in dog poo wormery) |
Dairy products, cheese (including cream cheese), potato salad, fat, grease and meat will be composted but the process is slow and may attract flies and creat unpleasant odours if left on the surface so are not usually recommended. If you do decide to add meat and dairy products I would suggest that you bury it rather than leave it on the surface. Mary Applelhol in "Worms Eat my Garbage" uses this method and writes that if she digs to soon into the pocket of bedding containing bones and decaying meat the odour is bad but if undisturbed it is not noticeable.
Onion and orange peel is included her list of "Food Waste Fed to Worms" in the same book.
Plant seeds from fruit and vegetable scraps will not be killed in the wormery and are likely to germinate. I add the waste from pumpkins and squashes and remove the seeds from the finished compost.
Avoid brown leaves and woody items are very slow to breal down in the wormery and are best composted or turned to leafmould
* Citrus and onions in wormeries
The general advice to the public seems to be that the onion family and citrus fruits should not be added to the wormery as they increase acidity and that as high acidity levels will kill the worms it is better not to add these materials. However, many sources report that feeding acidic materials in moderation may not cause problems but it would be advisable to measure the pH regularly and add lime as necessary to keep the material at or near pH7.
Onions, shallots, leeks and garlic can be added to the wormery but preferably in in small amounts or cooked first.
https://www.rhs.org.uk/advice/profile?pid=726
It may take longer for the worms to eat the dry outer layer of onions. https://www.epa.gov/recycle/how-create-and-maintain-indoor-worm-composting-bin#feed
If added to the wormery in large quantities onions said to burn the skin of the worms. https://www.wormcompostinghq.com/feeding-your-worms/
Onion skins and scraps can also be added with caution to a conventional compost bin traditional compost bin they do not negatively affect the composting microbes present in the bin but their smell may attract pests and unwelcome wildlife. In both compost bin and wormery they are best cut into small pieces before being added so that they breakdown more quickly. Worms do not like the smell of the onion family so, when given a choice, they may be left uneaten until they begin to rot.
Adding shredded paper, newspaper and cardboard may help control the onion smell and reduce the risk of attracting pests. https://homeguides.sfgate.com/can-compost-onions-72087.html
The situation is similar with citrus peel the advice is do not add it to the wormery but if it is added the worms will leave it until the peel to starts to decompose and then eat them.
https://www.worm-composting-help.com/feeding-citrus-peels-to-worms.html
Starting a wormery and feeding the worms
If you buy a wormery, it will normally be supplied with a starter kit containing bedding such coir blocks. These will normally require soaking before being added to the wormery. If making a home made wormery, an 8-10 cm layer of moist compost can be used as the initial bedding material.
Bedding for the worms is important to a succesful wormery. The worms will eat the bedding but it also provides a place to bury the food for the worms, insulation, moisture retention, a source of carbon and allows the movement of air through the medium. Suitable materials for bedding include shredded computer paper or newspaper, coir, peat moss, leaf mould or wood chip. Mature manure is used by some but is likely to produce an odour (at least during the initial stages).
The worms supplied with the wormery, purchased from a “fishing” shop or taken from an existing wormery or manure heap are then added. Some sources recommend leaving the worms to settle but others suggest adding a layer of kitchen waste at this stage. The worms should then the left undisturbed for about a week so that they can settle into their new home.
Once the worms have had a chance to settle into their new home feed them little and often. I normally feed mine twice a week as that is about the time it takes to fill the kitchen caddy. It is better to chop, or tear, the food into small pieces so that it starts to rot and can be eaten more quickly. The food can either be buried, about 3-5cm deep, in the bedding material/compost to create feeding pockets of placed on top of the compost. Placing the food on the compost makes it easier to monitor whether the worms are eating it and helps avoid overfeeding.
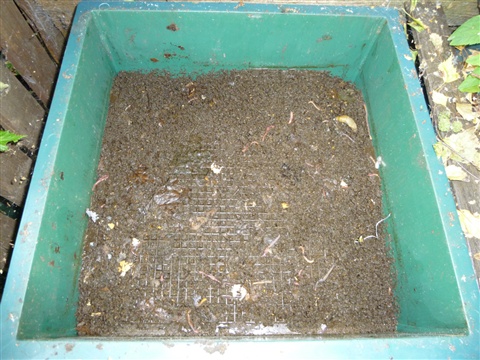
If the burial pocket technique is used it is best to divide the wormery into squares or rectangles and work round burying the food in successive squares.
| 1
| 5 | 9 |
| 2
| 6 | 10 |
| 3
| 7 | 11 |
| 4
| 8 | 12 |
If the worms are normally fed twice a week each square will have food added about once a month allowing plenty of time for the last food in the square to have been broken down or eaten.
I add Cardboard or shredded paper to provide a carbon source each time I feed the worms their kitchen scraps.
Deciding on how much to feed the worms is in practice a matter of trail and error. I have checked a number of sources which give weights of food and have discovered that the maths do not always add up. It is generally recognised that worms can eat up to half their own body weight every day so if you started your wormery by buying a kilo of worms you are looking to feed 0.5kg of food waste per day or 3.5 kg a week. As the worms can double in numbers every 60-90 days this can be increased gradually. Do not following this guideline blindly check on what is happening in the bin the amount eaten will vary with the conditions, temperature etc. I tend to divide the contents of my 5 litre worm food caddy between my three wormeries at home based on the tried and tested method of looking to see how much they have eaten.
Once the wormery is established in can be left without attention for three or four weeks so it will not be necessary to take the worms on holiday with you. However they will continue producing “worm wee” and I would suggest that the reservoir tap is left open over a tray or bottle so that the compost does not become waterlogged
Wormery Environment
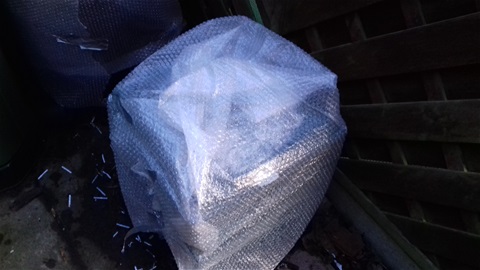
Stacking wormery wearing bubblewrap to stop the worms freezing during the winter
Temperature
Worms normal live in the soil and like moist, warm conditions within a temperature range of about 18-25C some variation of temperature can be tolerated but the activity of the worms decrease above 30C and below 10C. It is recommended that the wormery is shaded or kept out of direct sunlight in the summer and protected from freezing during the winter. Moving the wormery in a shed or garage during the winter is recommended although where this is not possible wrapping it in bubble wrap or loft insulation (inside a plastic bag to keep it dry) should protect the worms during most British winters.
pH
Composting worms prefer an approximately neutral pH of 6.5 -7. They are quite sensitive to acidity
Moisture
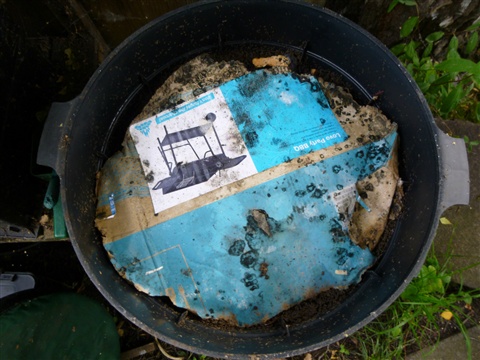
Composting worms like a moist but not water logged environment. If a plastic wormery is used, it is important to see that any drainage holes are kept clear and that the worm wee reservoir is drained regularly. I attend to cover the compost in the top tray of my wormeries with cardboard to help retain the moisture before closing the lid.
Harvesting Worm Compost
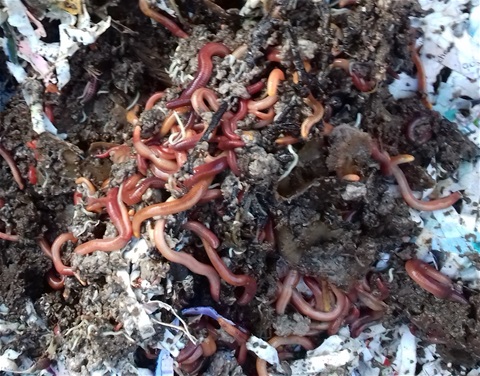
Worm ball formed in a stacking wormery
The compost should be ready after about 3 months depending on the conditions, number of worms and time of year.
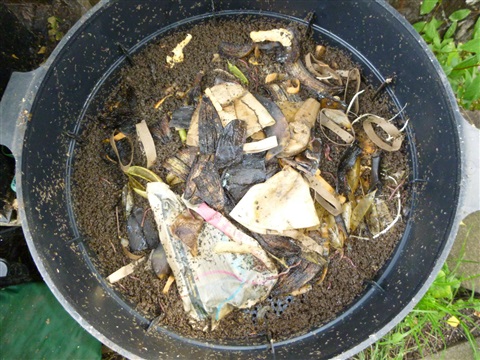
It is easy to harvest the composted from stacking wormeries as the worms will work their way up to the top trays in search of food enabling the bottom tray containing the completed compost to be removed, emptied and placed ready on the top of the wormery.
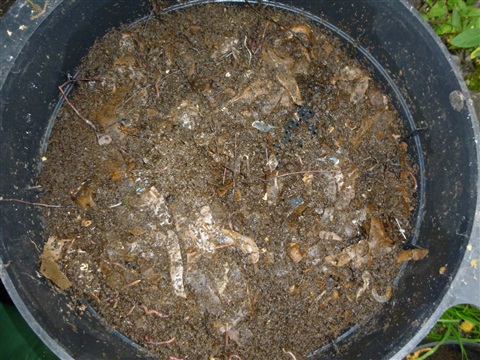
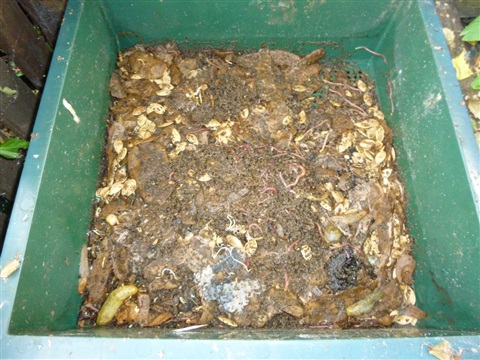
Harvesting a single chamber wormery requires a little more effort as the compost has to be tipped out of the container and the separated from the unfinished compost and the worms.
Composting worms normally live in the top layer of the compost just below the food waste. It is therefore a simple job to remove the food waste and the top 12” layer of compost, which will contain most of the worms. Once the wormery has been emptied, this material can be returned to restart the composting process.
Some worms will be left in the harvested compost layer and it is relatively easy to capture (or rescue0 them by means of the spread and mound method. Place a sheet of polythene on the ground and make a thin layer of compost over the sheet. Make two or three mounds to compost spaced evenly across the material and the worms will migrate to them. Alternatively place a sheet of wet newspaper over the compost in two of three locations and the worms will hide under them.
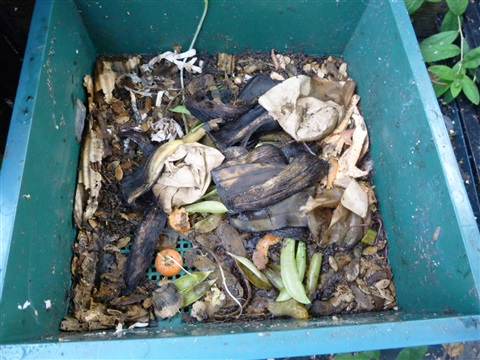
Single Chamber wormery
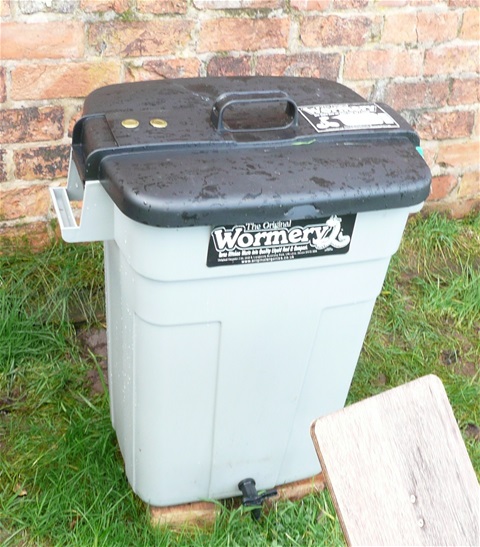
Original Organics wormery at Compost Corner Sibston Discovery Park, Coalville, Leics.
All-in–one wormery
The simplest commercial style of wormery is a single container with holes in the base or a tap (on better models) to allow drainage and harvesting of the worm wee. The compost is harvested by removing the top layer 7-8” of undigested waste, to be returned to the empty wormery later, and dumping the rest of the contents on a plastic sheet.Making cones of of the compost on the sheet will attract the worms and these can be replaced in the wormery. Alternativey spread the compost out and cover part with danp newspaper the worms move to the paper to get out of the light and can then be harvested. The rest of the compost the finished compost can then be harvested. Uncomposted material and the worms are returned to the container and the cycle started again.
The wormery can be mounted on a stand to make it easier to drain off the worm wee or bricks/breeze blocks can be used.There ar a range of sizes available.
Indoor wormery
Indoor wormery on worktop under kitchen cupbpards
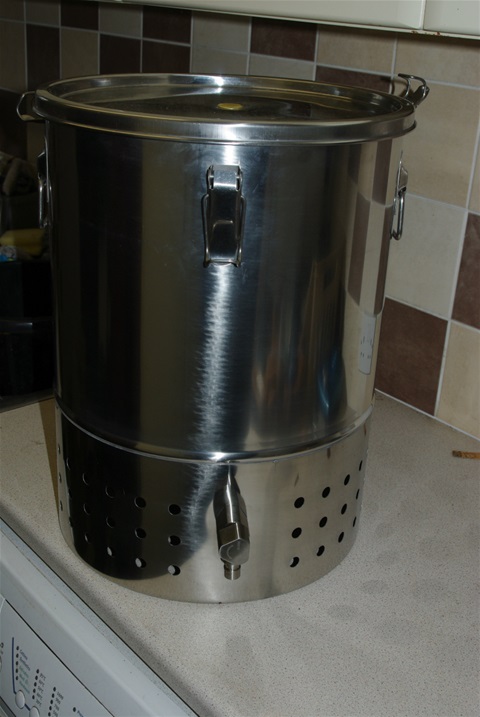
Original Organics are now marketing a stainless steel wormery specifically for indoor use. I have only recently purchased and will update this section as composting progresses.
The Indoor Wormery - has a capacity of 30 litre, which should deal with the kitchen waste from a family of two or thre. It has a single composting chamber complete with tap to drain off the worm wee. It also includes an integral drainage platform and sump, a built in stand, triple pressure clip points and side handles for easy mobility
This hygienically designed Wormery, is designed to be used in the kitchen but mine has been relegated to the utility room. It will stand on a work top and fit under the overbench cupboards but will need moving when adding food.I have added some more photos below
Further details are availkable at http://www.originalorganics.co.uk/
I also feel that this model should be quite attractive for schools where a wormery that can be easily fed under the supervision of staff would avoid some of the problems experienced with outdoor wormeries to which there is uncontrolled access, with the risk of over feeding. It could also be taken home by a responsible person over the summer holidays
Stacking or multi tray wormery.
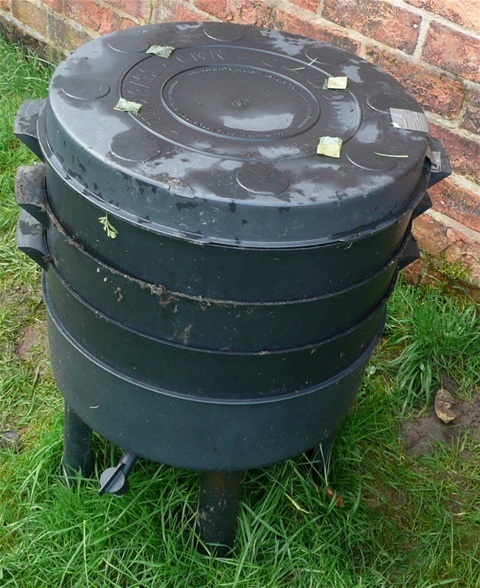
This consists of a reservoir, usually on legs, to collect the worm wee and two or more containers which stack one above the other. The worms and kitchen waste are placed in the first tray to start the wormery. When this is nearly full the second composting tray is added. Place a small amount of the compost from the bottom tray into the new one, so that the worms have something familiar to move into and start adding waste food. When this tray is full add the next. By the time the third or fourth tray is full most of the worms will have left the first tray and the compost can be harvested.
-
Stacking wormery
Top Tray -
Stacking wormery
Second tray -
Stacking Wormery
Third tray
Compost ready to harvest
-
Second style stacking wormery (from Original Organics) Top tray
-
Second Tray
-
Third tray Compost ready to harvest
Subpod Below Ground wormery
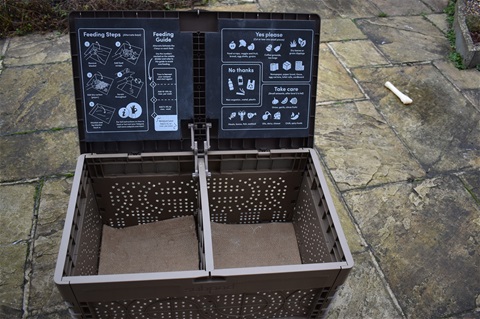
Subpod is a simple to use wormery where the worms are housed below the ground providing effective composting while protected from the sunlight and cold weather. It can be used to deal with waste from a family of four or units can be mounted together to form a community wormery. The twin chambered wormery is normaly started with about 2,000 worms but an interesting feature is that the buried base has holes that enables the worms to travel into and aerate the surrounding garden soil. It is suggested that the wormery is used in a raised bed. To empty a chamber the worms are fed in the other chamber so that most of the worms from the chamber to be emptied move "next door" allowing the compost to be harvested.
We will have a Subpod at the Stokes Wood Demonstration site as soon as restrictions allow the site to open again. The Subpod is well made and looks as if it should provide years of use
The lid of the compost system forms a seat to encourage gardeners to relax and enjoy the garden. www.subpod.co.uk
-
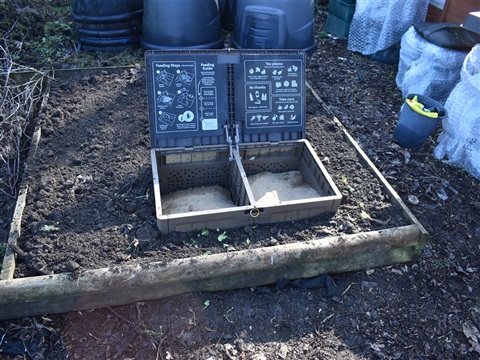
Subpod in a raised bed
-
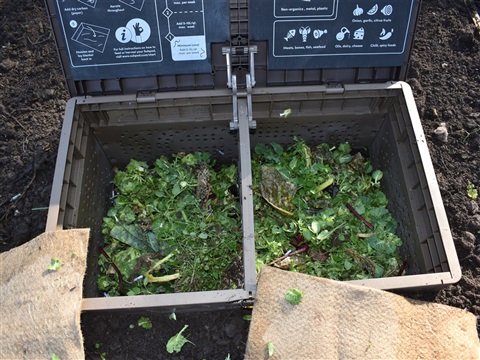
Subpod in use
Home made wormery
DIY Wormery
A cheap and simple wormery can be made from any suitable plastic container such as an old plastic bin (with a well fitted lid), water butt or dustbin. Drill several small holes near the top to allow air to enter the container, if you find that worms escape cover with gauze on the inside.
Reservoir. Create a reservoir to collect the worm wee by inserting a platform to keep worms and solids above whilst allowing the easy flow of liquid into the sump created beneath the separating tray. This could be a plastic flower pot stand turned upside down with holes drilled in the base, wire or plastic mesh supported on bricks; wood or plastic with drilled drainage holes supported on bricks or mounted on shelf supports fitted to the side of the container. Drill a drainage holes in the container as shown or a tap hole about 25mm above the base of the bin within the reservoir. This may need to be lower if you use a flower pot tray as a separator and fit a standard plastic water butt tap (25mm diameter hole). Use bricks or blocks to raise the unit off the ground for easy access harvesting of the worm wee. For further details go to http://www.brysoneducation.org
-
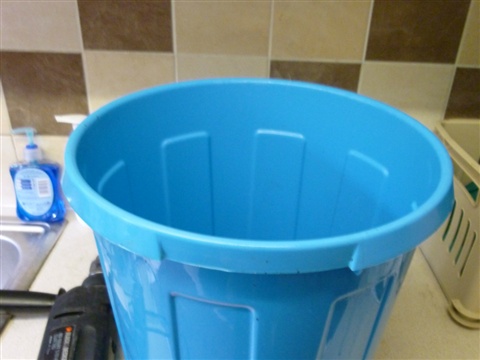
Simple wormery
Take a plastic bin of a suitable size and drill drainage holes in the base or drill a single larger hole and fit a drainage tap.
-
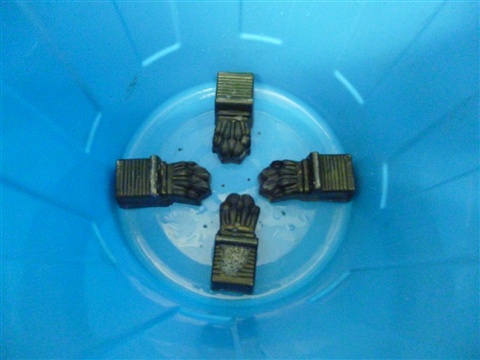
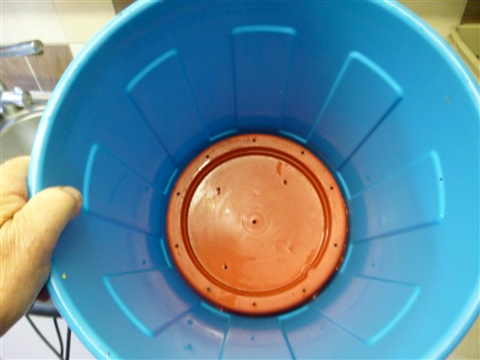
Place flower pot stands in the bottle to support the top of the drainage reservoir
-
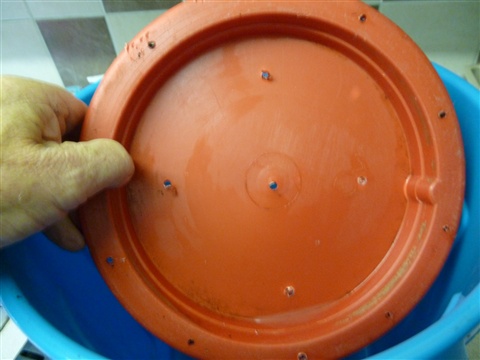
The top of the drainage reservoir. A flower pot dish with small holes drilled in it to allow worm wee to drain from the compost.

Jill Brown
Why can’t I feed my worms with leeks and onions?
Elsabe
Very nice